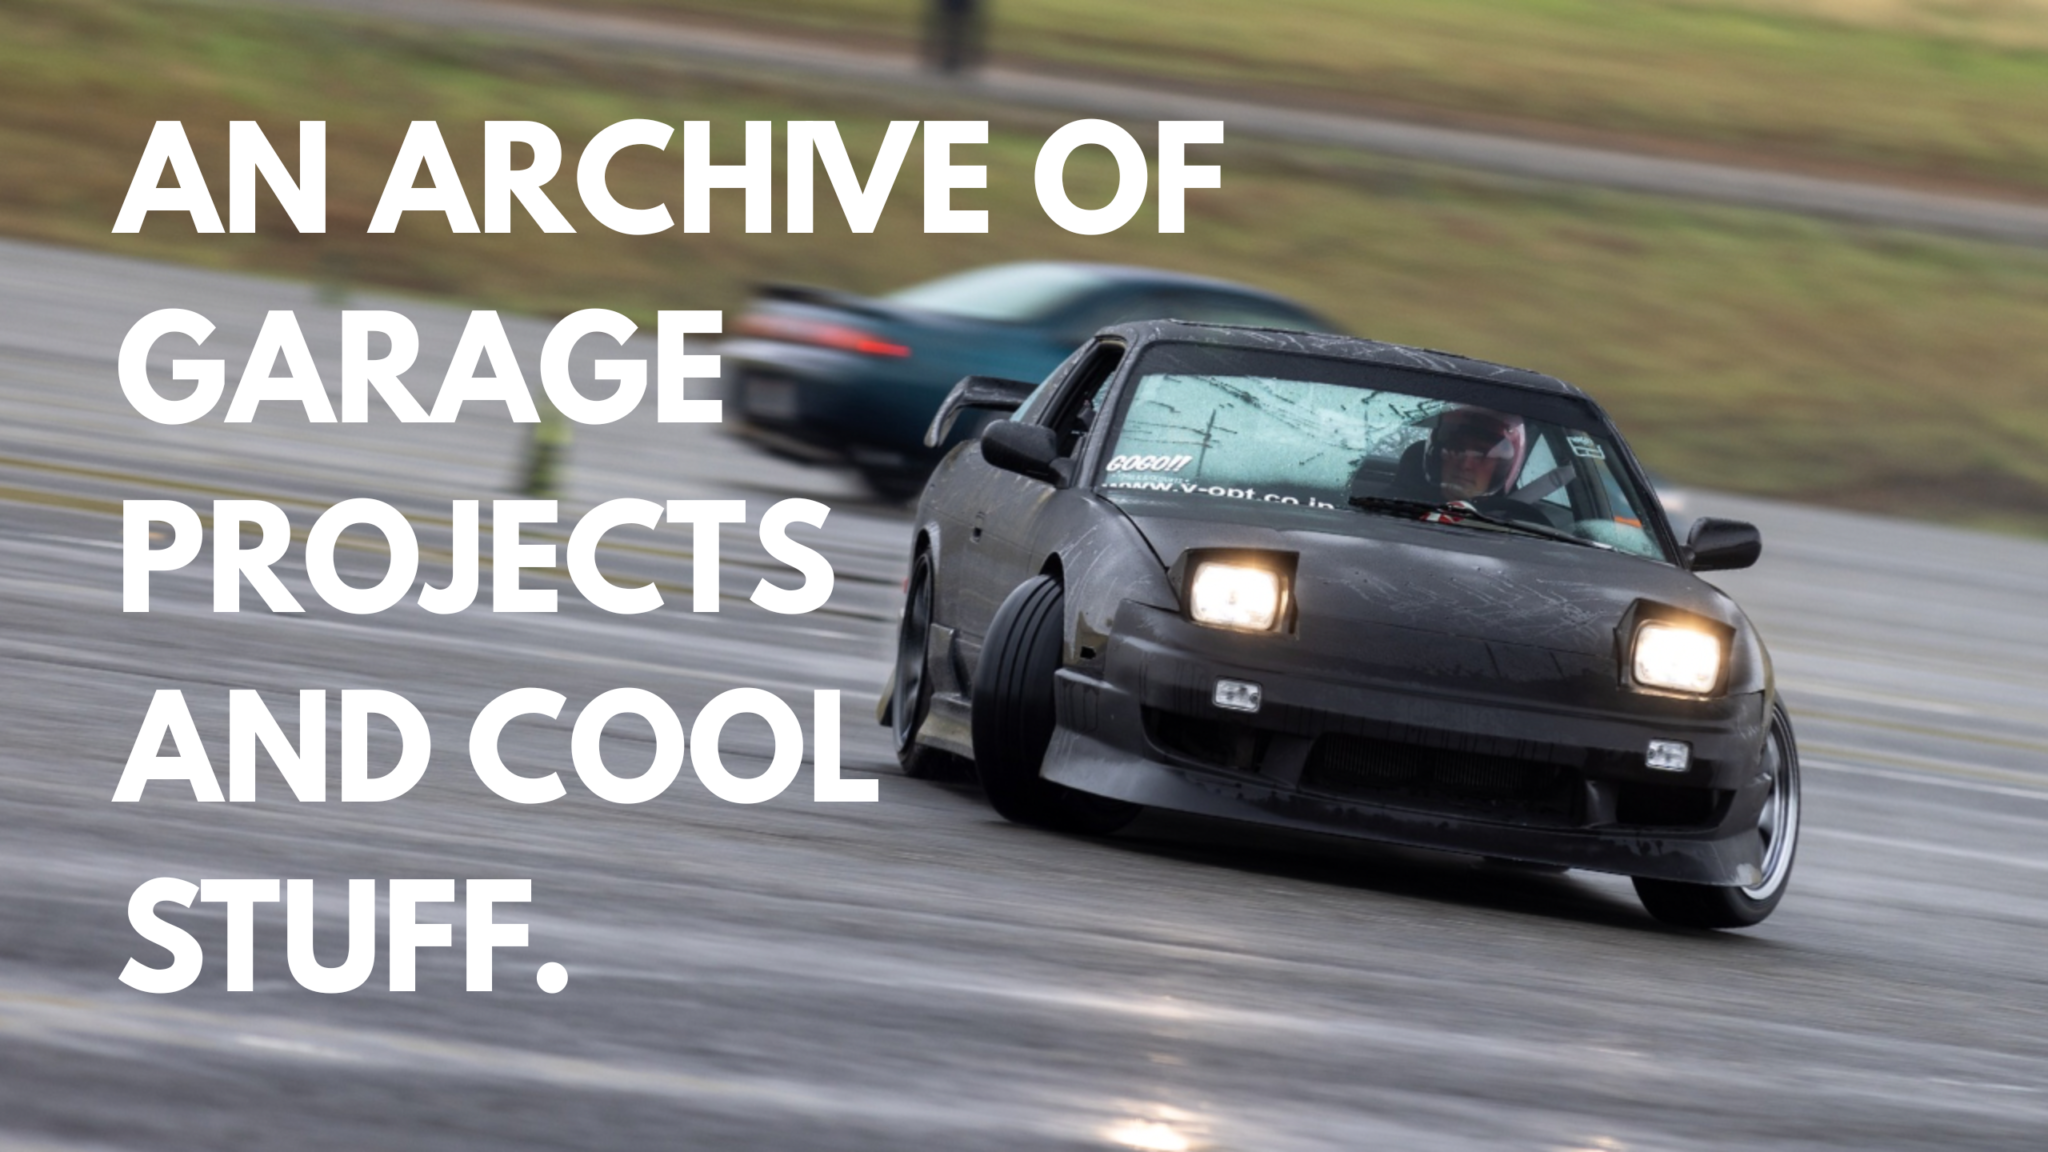
Car Spotting in Mexico 2025
by sebastian on march 25, 2026
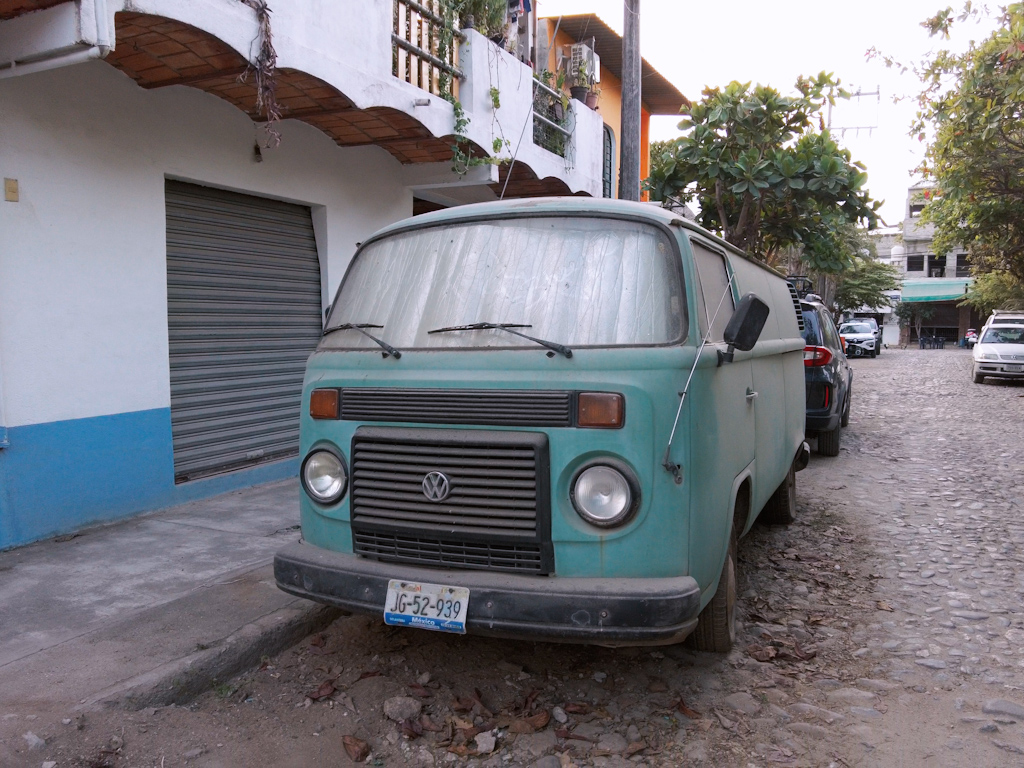
After 18 years, I finally had a chance to visit some family in Mexico last year. I took the opportunity to record some cars that caught my attention while roaming Guadalajara, Sayulita, Tlaquepaque, and San Pancho. Definitely need to visit more frequently.

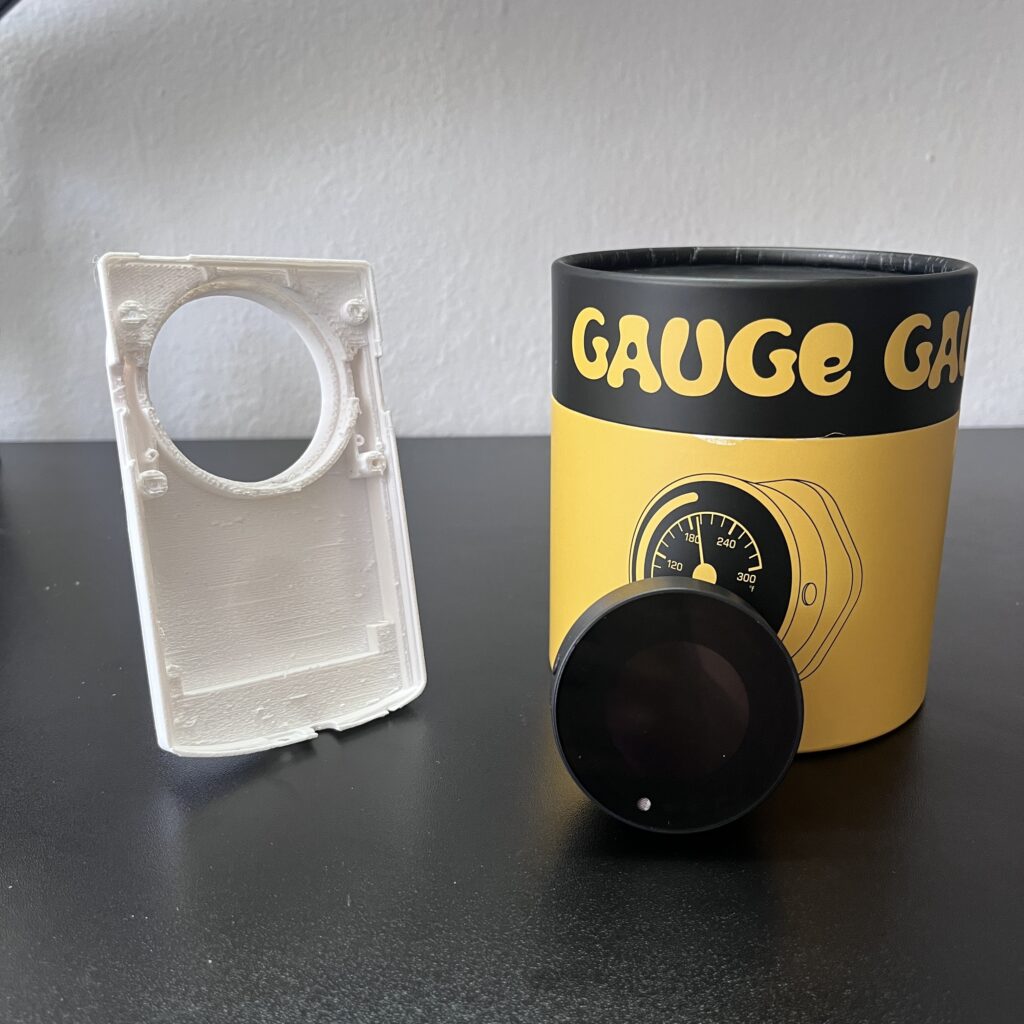
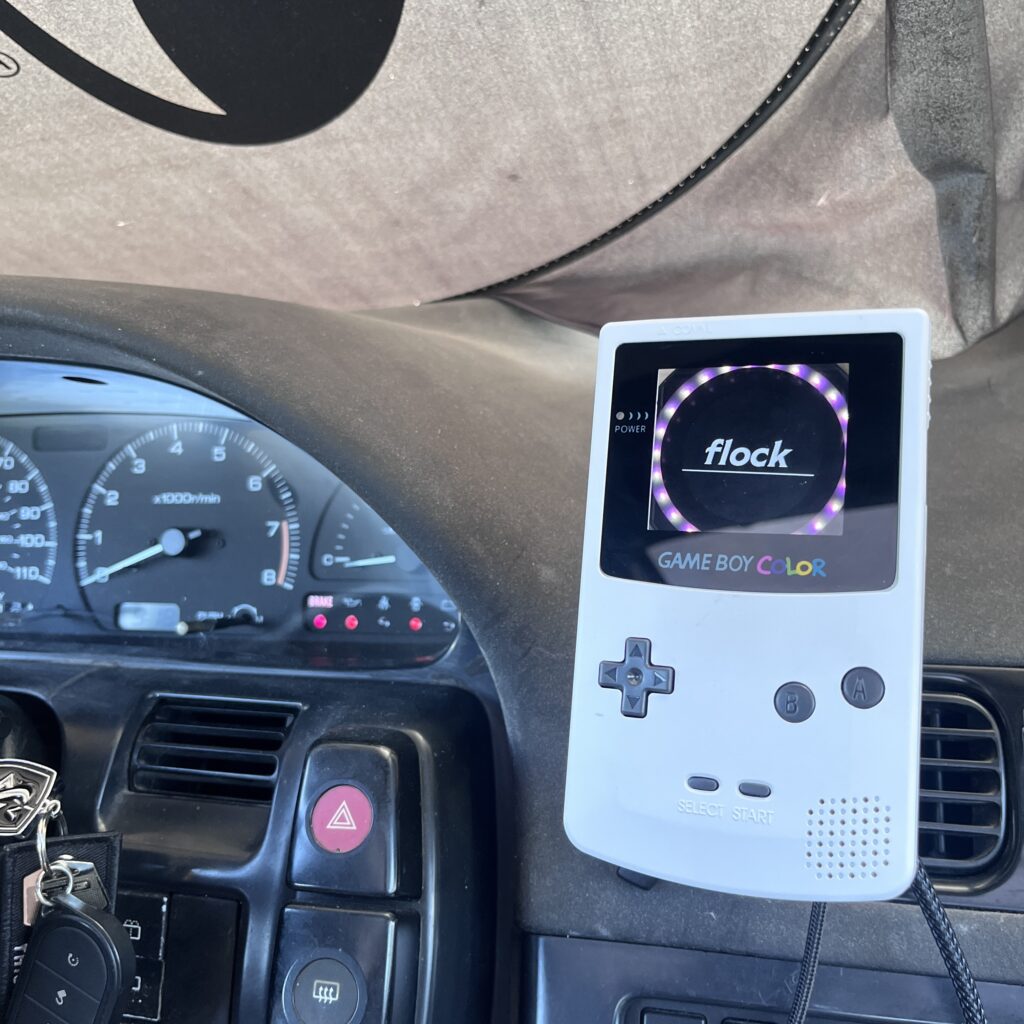
Gameboy Color Flock Gauge Mount V1
by sebastian on june 1, 2025
Here’s a quick run down for my Gameboy Color Flock Gauge Mount V1:
Materials needed:
- Buy a Flock Gauge (found here)
- 3D print of Gameboy Flock Gauge Back Shell V1 (stl file download here)
- 3D print of Draklore Flock Lock (available for download here)
- Buy a Gameboy Color Replacement Shell (found on eBay, example here)
- Buy a 17mm Ball Joint Car Phone Holder (found on Amazon examples here and here)
- 3D print of 17mm Ball Joint Nut *if not supplied by your phone holder purchase* (available for download here)
For your convenience, all 3D print .stl files can be downloaded here.
Steps:
- Press in Flock gauge into 3D printed back shell (it’s a snug fit and may require slight sanding depending on what printer was used)
- Install Draklore Flock Lock to secure gauge in place
- Assemble front Gameboy shell and glass screen. Buttons can be glued in place
- Join back shell and front shell and secure with screws
- Securely mount car phone holder inside vehicle. Articulate and tighten down in a position that minimizes movement
- Install Gameboy gauge assembly on phone mount and secure with locking nut
- Set up your Flock gauge and enjoy!
If you have any feedback or questions, feel free to comment or send me a message on instagram @milkandkoukis.
For further background explanation and details continue below.


Disclaimer: This project was created for fun as a personal hobby. It uses various components and models assembled into a custom product. I do not intend to profit from it, and no copyright or trademark infringement is intended.
Back Shell – Gameboy Color Flock Gauge Mount V1
Nothing screams the ’90s like a Game Boy. I’ve always thought it’d be cool to have an APEXi Power FC or a COBB Accessport designed like a Game Boy to complement a ’90s-era sh*tbox. While tracking the production of the Flock Gauge, I knew it would be the perfect product to turn into a Gameboy. Once I received my Flock gauge I got to work.
I bought a Gameboy color replacement shell and roughly cut away to get an idea of how the gauge should fit. With the power of the internet and various makers, I modified and pieced together the back shell with the measurements I took from the chopped shell.
The main part of the shell is derived from BRYANU’s design available for purchase on cults.com here. After some modification to that file, I also added a phone mount derived from aborchew’s design available for download at printables.com here.
This component will need to be 3D printed. Ideally in a material like PETG that will withstand the heat in the car. When pressing the gauge in, I recommend using both thumbs and palms and gently apply even pressure. If the fit is too tight, lightly sand some material away to allow for the gauge to slide in. Make sure the gauge is clocked correctly, buttons should be on the sides at 3 o’clock and 9 o’clock.

Draklore Flock Lock
As I was putting this together, Draklore shared a file for the final piece needed for this build. A nut that threads into the gauge and secures it to the back shell. A lot of great products on their site, go check it out!
Gameboy Color Shell Replacement
When picking out your replacement shell, its important to keep a few things in mind. First make sure your purchase comes with screws, tools, buttons, and a screen replacement. Another thing to note is some shells do not come with the Nintendo logo. Unfortunately I missed this detail and have a logo-less shell. Its also important to note this mode is intended for Gameboy Colors, not any other model.
Gameboy modders even have some screens that are larger than original. If you want your viewing window to have a bit more room, look into the Q5 lens replacement (may require some trimming to the front shell).
When putting the shell together for this mod, since there will be no Gameboy board, the buttons should be glued into place and will have no function beside decoration. Afterall, this is just a holder for the gauge. (See below for details on future improvements).
Once the front shell is assembled, screw it together with the back shell assembly. Note: Gameboys utilize tri-wing screws as well as phillips head screws.

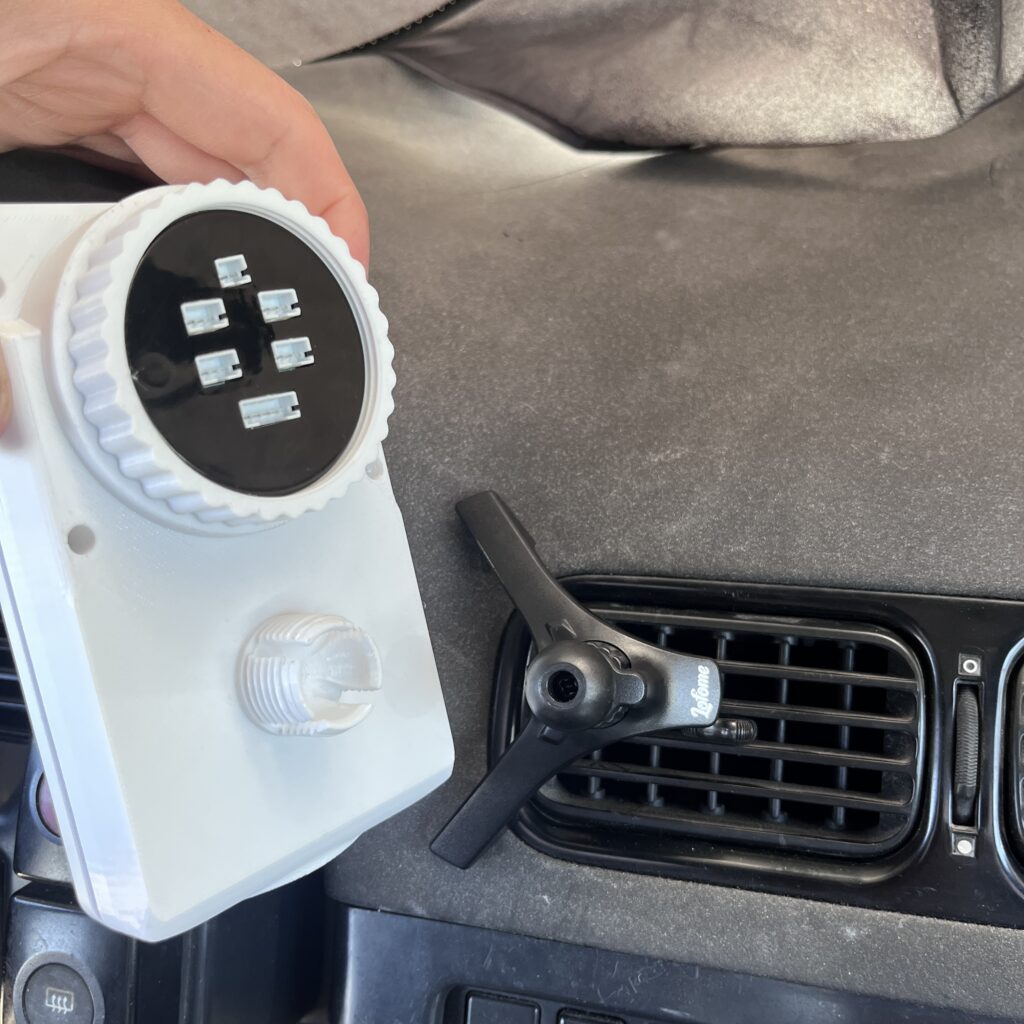
Phone Holder
Now that the assembly is put together, you need a place to mount to your car. I opted for using a universal phone mount to allow for articulation and ease of use in multiple vehicles. These are the typical vent mounts that tighten down and the Gameboy is joined with a 17mm ball joint. Some phone holder products come with a locking nut, but if yours did not, print the locking nut found in the .stl file downloads.
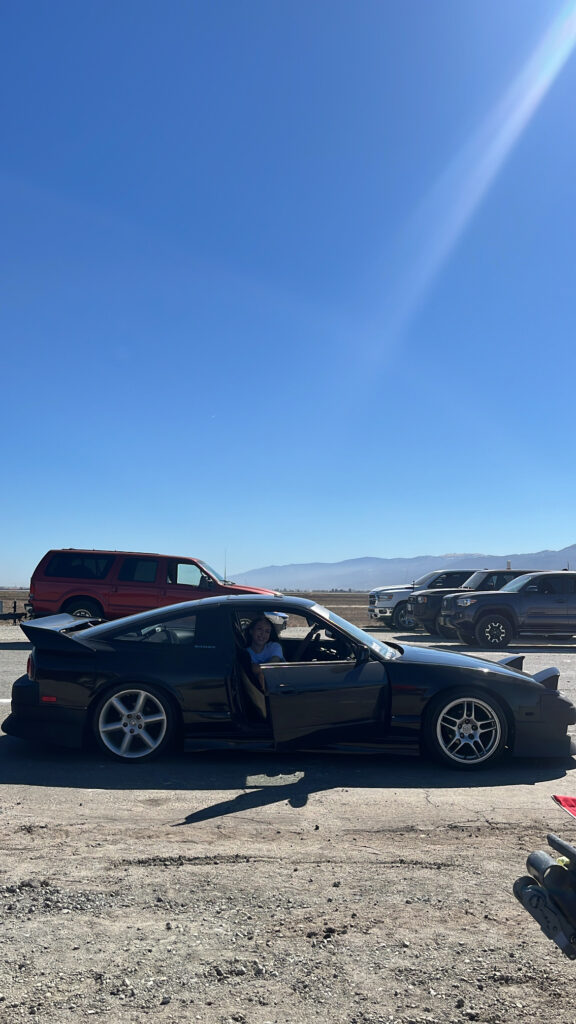
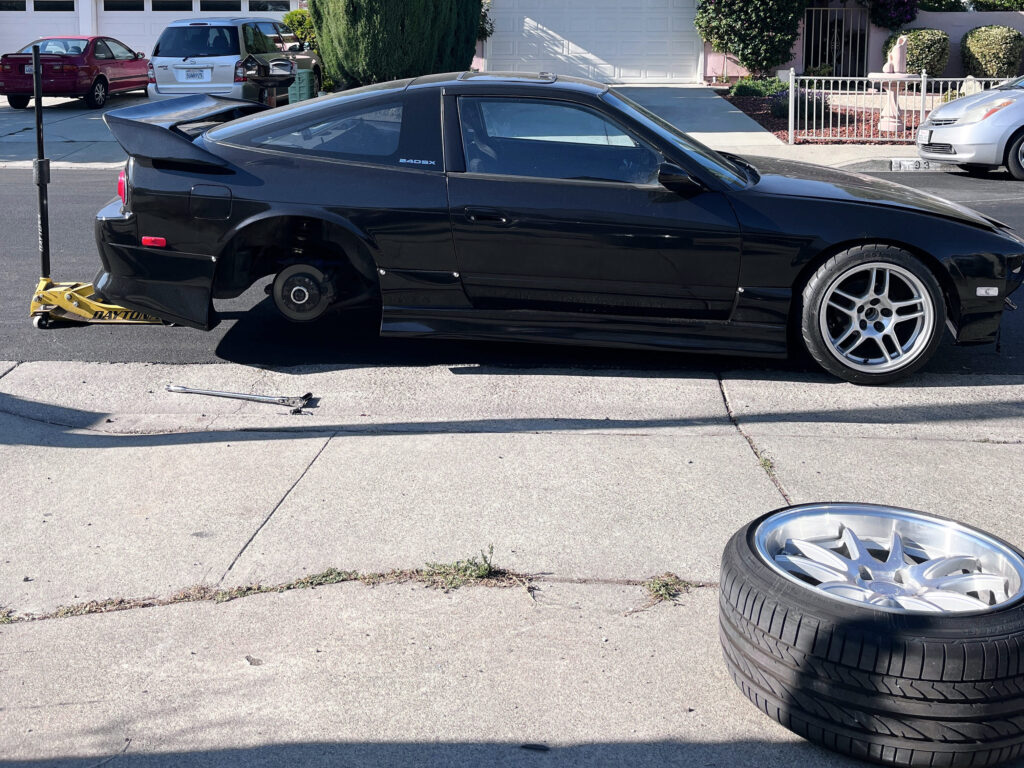
I found the product that works best for me is the one found here. This allows for rotation of the hook that latches onto the car vents, and the V-shape allows for sturdier mounting. Below is how I have it installed in my S13 currently. Find a position that limits the movement of the car vent.
After your mount is on the car, all that’s left to do is press in the Gameboy Flock Gauge assembly to the ball joint and lock into place with a nut.


Future Improvements
First and foremost, I am currently working on adding buttons on the side of the shell so that the gauge buttons can be pressed. This will make the gauge buttons accessible as intended. As of now, you can stick a small screw driver or allen key to switch the gauge into settings mode. Hoping to have the buttons available for download as soon as possible.
Another detail I noticed when putting this together is the Flock gauge is circular, and the Gameboy viewing window is square. Some of the LED’s surrounding the gauge are obstructed from view. Ideally, the entirety of the gauge face should be viewable. Like mentioned before there are some screen replacements that are slightly larger to help with this without straying away from the classic Gameboy look. For now I think it works great, but there’s definitely some room for improvement.
I hope you enjoy this mod as much as I enjoyed putting it together. If you have any feedback or questions, feel free to comment or send me a message on instagram @milkandkoukis.
stay safe and do better!
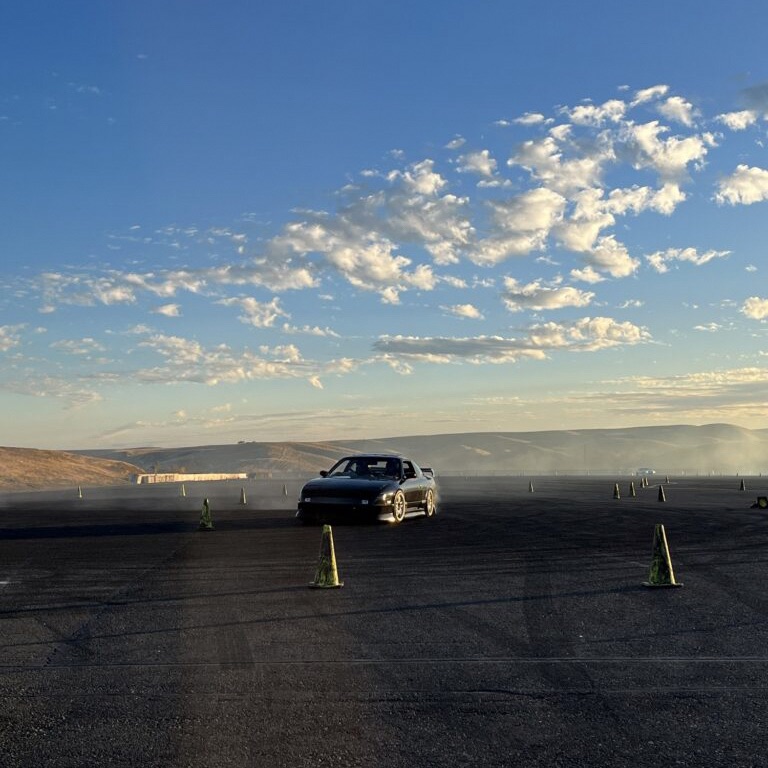
What I Learned My First Year Drifting
by sebastian on january 22, 2025
It’s been a kick ass year of finally taking my car out to events and learning how to drive. Let me go over what I learned for those looking to start drifting.
Start on Sim
Although not a prerequisite, sim racing is overall a very powerful tool to get started.
Firstly, it’s relatively cheap compared to actual drifting (where you maintain a car, buy tires, event fees, etc) a sim will set you back as little as $200 if you buy used online.
A sim will never feel like the real deal, but it will give you fundamental muscle memory and an idea of how the car reacts in certain situations. This will make your first real event a lot more enjoyable and productive.
Dial in Your Car
A very crucial step is making sure your car is equipped with the proper set up. Though you should’ve dive too deep starting out, you for sure need the basics. If you have a welded diff, coilovers, and an appropriately sized tire, you are well on your way for a fun time at the track.
Also ensure your car is functioning well. An improperly adjusted TPS made my first few events very difficult.
So make sure you have a basic setup and make sure your car works. Do your research and try things out until you find success.
Manage Variables
Speaking of finding success, make sure you take notes of any changes you make and how it affected your driving. You want to have a relatively consistent car so that you can progress your driving.
Slowly make upgrades and changes as events progress. But in all honesty, the best upgrade you can make is to your driving. Focus on how you drive, rather than components to make your car “better”.
Socialize
If you have questions, talk to people. We all start somewhere and sometimes looking through old forums or videos doesn’t help. Ask for a ride along and study how good drivers drive.
DRIVE!
While you can rant all day about what to do to your car and driving techniques, you will only get better by driving. Aim to learn something and/or try something new every event. Critique yourself and make adjustments. More importantly, have fun doing it. If driving doesn’t put a smile on your face, you are doing it wrong.
see ya out there!
Sim Donuts – IDK S#!t About Drifting
by sebastian on september 24, 2024
Introduction
Over the years I’ve learned a thing or two about working on cars, but nothing about making them go sideways. I became a fanboy of drifting at 12 years old ever since I watched former FD driver, Tanner Foust, put on an elegant display of car control on an early episode of Top Gear USA. I have been obsessed ever since. I’ve watched countless videos and consumed tons of drifting media but now it’s time to learn. Now at 24 years old, I decided to start where all modern 12-year-olds learn to drive, on a racing simulator.
My goals with the simulator are not to learn how to drift but rather, learn the muscle memory to apply to my first drift event. Because truthfully, I’ve never kicked a clutch.
Setup
Starting out, I strongly suggest just getting a basic setup. No need to spend your whole allowance on a sim rig you MAYBE use once a month. Save your money for your real drift car and just get through the sim door with something affordable. Once you can justify fancy equipment, then you should upgrade.
Right off the bat, the most expensive equipment is going to be a PC and monitor. If you already have that, then you’re already almost there!
Sim Rig I Use:
Logitech G29
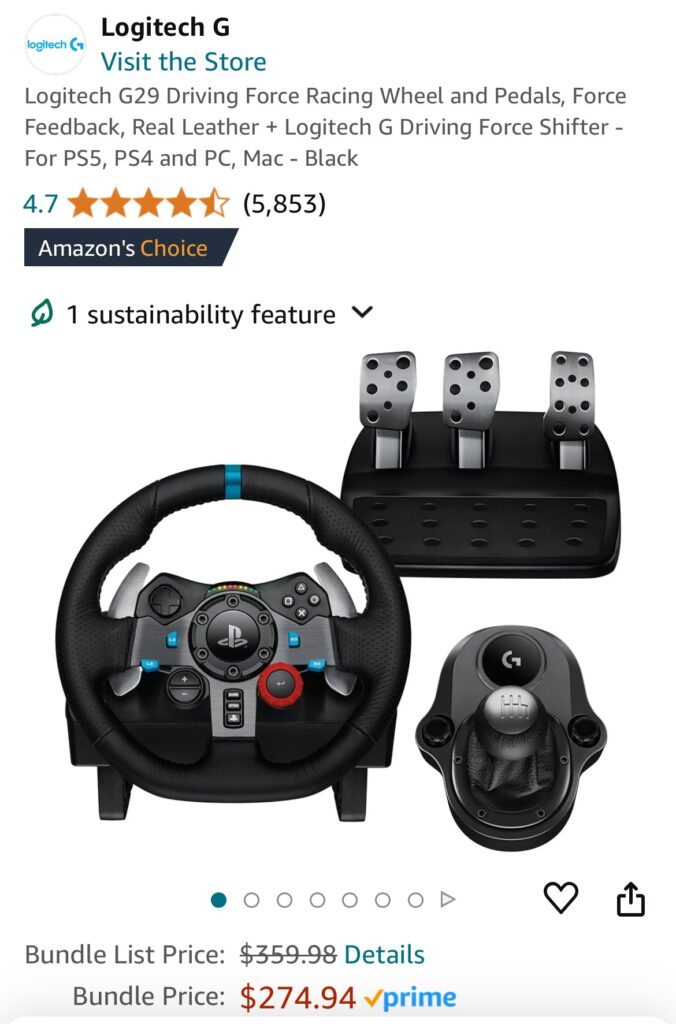
I currently have a used Logitech G29 I found online. I highly recommend checking marketplace for a Logitech sim rig. It’s easy, tons of support and troubleshooting guides. Great starting point. I paid roughly $170 secondhand. Minus the unnecessary handbrake and steering wheel upgrade.
Stand I Use:
VEVOR Racing Stand
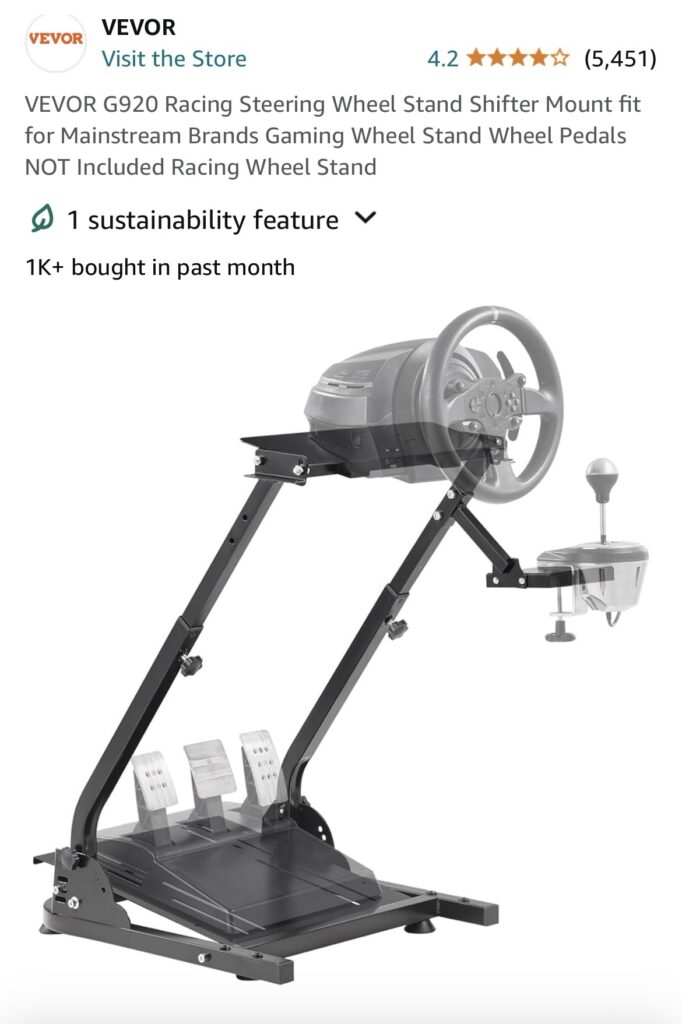
I currently use this Vevor stand from Amazon. To be honest, it is a bit wobbly at times but it gets the job done and the price was right. Plus it conveniently folds up so that it is easier to store away. In the future, when I have a more permanent place for sim racing, I will build a better stand.
Game Setup:
After purchasing Assetto Corsa on Steam, you want to unlock the countless mods it has to offer. First download Assetto Content Manager. This is where you will fire up your game with all your mods. Then you will also want to download the custom shaders pack that will allow you to run all the cars you download.
Car Packs:
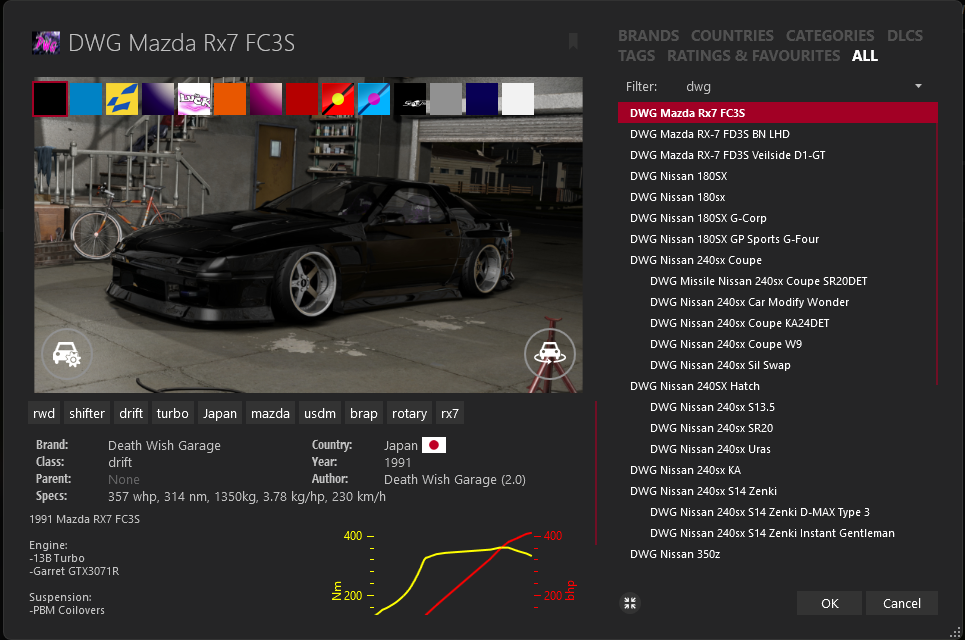
I recommend downloading the Death Wish Garage car pack. Plenty of stylish cars with ranging HP and wheelbases.
Doing Donuts
To effectively learn how to drift on sim, with hopes to apply it to real life, I recommend you play in 3rd person. At least in the beginning! 3rd person allows a better view of where you are in space, how the car is behaving, and where your wheels are pointed. All things that will help a bunch when starting out.
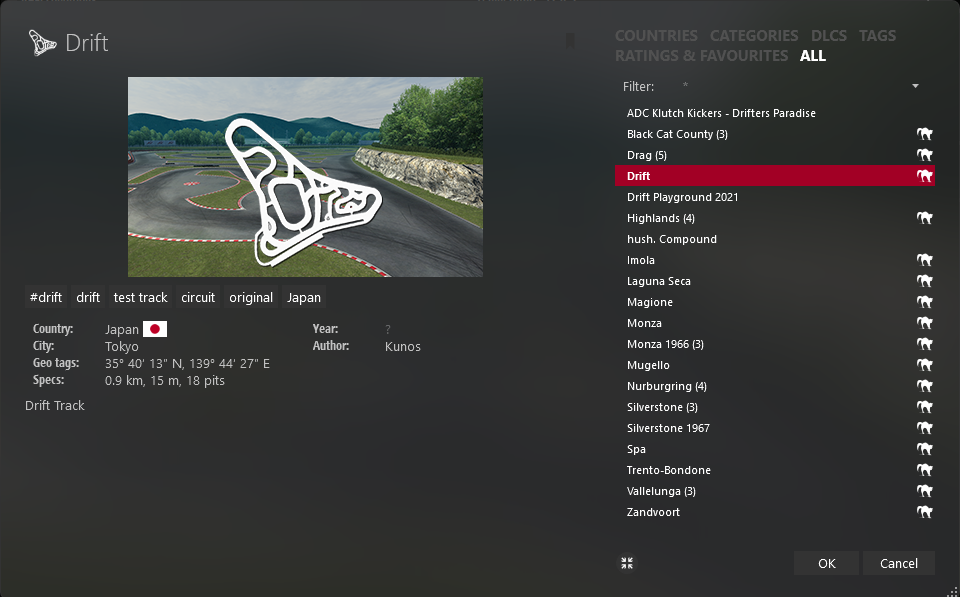
I recommend starting in the stock drift map on Assetto and going to this donut circle. Use this circle as a guide to see how well you can go around an object.
Use a car with a 200-350hp range. Although not a prerequisite (but helpful) in the real world, a little bit more power in the sim world will help you break traction a little more consistently which will help when practicing. Too little power can be inconsistent when you are starting out and too much power will be too sensitive.
You want to start with donuts before progressing. Donuts can be boring but are truly fundamental for everything else. Don’t skip steps! Walk before you run.
For a proper counter steer donut, follow these steps:
- Turn into the direction you want to go. Either stopped or slightly rolling.
- Break traction by stomping on gas, or clutch kick (high revs and dumping the clutch). Give enough throttle so the car starts to kick out. Once spinning, let off throttle to avoid a spin out.
- Once the car starts to kick out, let go of the steering wheel to allow the car to counter-steer. Essentially the car will point the wheels in the direction of your momentum.
- Once you reach a point where the car has counter steer’ed, catch your drift by grabbing the wheel again and getting back on the throttle. Make corrections with steering and throttle input described below.
| For More Angle: | For Less Angle: |
| More throttle | Less Throttle |
| Less Countersteer | More Countersteer |
Final Thoughts
Although you can never replace the real deal, sim drifting is a cost effective and fun way to be involved. I think it teaches fundamental hand eye coordination and muscle memory required to be successful on your first drift event. If you can do donuts in the sim you can do donuts in real life. It’s better to already have that in your back pocket when you go spend real money on a track day and tires. Next time, I’ll show you how that went for me.
T.N.T DICE – A Short Film
by sebastian on march 25, 2024
Fueled by the monotonous hours at a cubicle and the burning desire to play some beer die with the boys, this short film was pieced together with some old college camcorder clips. Its bitter-sweet to think that the conditions of our senior year will never be replicable. After having almost half of our college experience taken away by Covid, we came back strong to have the most memorable senior year. The beaches in Isla Vista were still mostly sand, and Del Playa was still (for the most part) standing strong. With no worries in the world, we truly lived like beach bums, woken up by the sounds of seagull squawks and last nights aluminum cans rolling with the breeze. Times have changed now as we all, unfortunately, have more adult responsibilities. But one thing hasn’t changed though, and that’s never turning down a game of beer die!
Although I struggled to upload this on multiple social media platforms. Here is the full unedited, unfiltered version of this video, as it was meant to be enjoyed. Cheers! 🍻